My application can be found in the Windows store. So I decided, now that I have a Surface Pro, I really should have a go at creating a Windows Store application. Windows Store Apps are applications that are optimized for touch screen environments and run on top of the new Windows Runtime APIs. Windows Runtime supports a variety of programming languages - C++, C#, Javascript and HTML etc. For my first experience, and also because it seems to be the way forward, I opted to use HTML and JavaScript as the programming languages of choice for my application. The main distribution mechanism for Windows Store Apps is via the Windows Store. In some cases (e.g. enterprise or volume licensing) you can also deploy windows store apps outside the context of the Windows Store. For my application I wanted to get it certified and added to the Windows Store to allow others to download it.
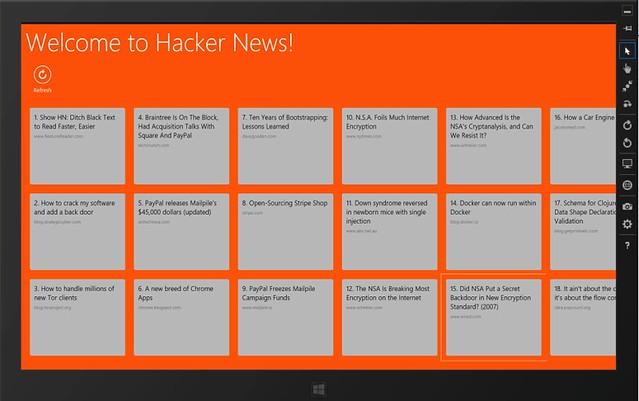
The functionality was going to be straight forward. I wanted to provide an app which allowed users to browse and interact with the popular technology news aggregator - Hacker News. The app would be simple - at least for release 1. It would show users the top trending news stories on Hacker News. A user could touch a specific story to bring up the comment thread for that story. Bringing up the comment thread would also allow the user to browse to the original link. This would launch Internet Explorer and show the original article. The user could snap (or in Windows 8.1 it default snaps when IE is launched) and this would show the comment thread along side the article. So the application is very simple. In future releases more complicated functionality may be added.
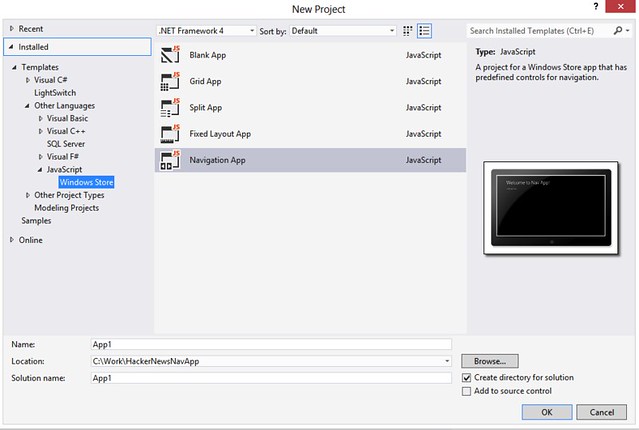
It was pretty simple to get started building the application. Using Visual Studio 2012 there are a variety of predefined project templates to choose from for building a Windows Store application.
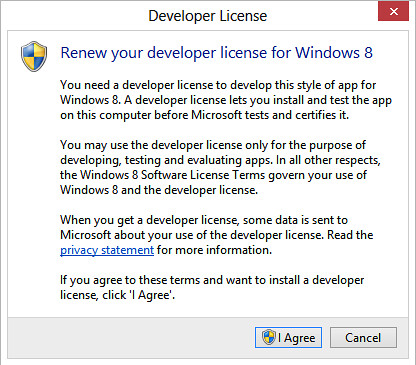
Choosing one of these templates will cause Visual Studio to prompt you to get (or renew if it has expired) a developer license from Microsoft in order to develop this type of application. These are free and need to be renewed every 30 days. If you get a developer license through your developer account it has to be renewed every 90 days. In order to submit applications to the Windows Store for certification you have to get a developer account.
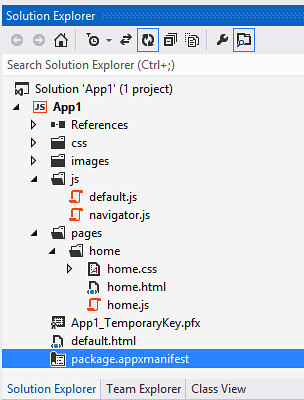
The initial project template I chose was a Navigation App Template. This gave me a default homepage out of the box and some predefined js files.
It was pretty easy to start developing from that point forward. Pressing f5 launched the application as expected, and you could debug through it etc. Even though I was using HTML and JavaScript, Visual Studio still provided a very robust debugging experience. One thing I found very useful was the DOM explorer. While running the application I could switch it to a snapped state, have Visual Studio in a snapped state also and then use the DOM Explorer to select elements on the application. Also, it was worth noting that in the css there are options for different styling based on if the application is running full screen or not.
Once I had the development side of my application done it was time to do some testing with it on a different device. This was relatively easy. From the project menu you can choose to Create an App Package (Project -> Store -> Create App Package…).
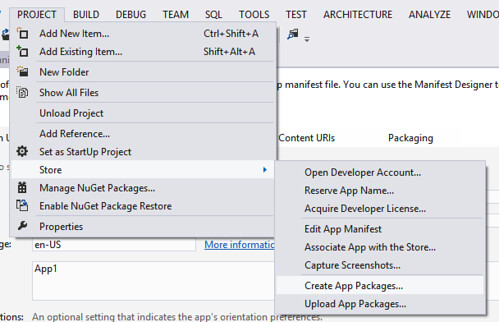
When this launches, you can choose to deploy it to the Windows Store or not. For testing on another development device you can choose to not to build a package for the store. This will build a package, along with a PowerShell script to install that package. You can take that package and put it on another device running Windows 8 device and run the PowerShell script. This will install the application allowing you to test it on that device.
Now I was ready to upload my application the Windows Store. You will want to make sure your application’s package manifest is in order before doing this. This is a set of properties about your application, including various logos and screenshots etc.

One key thing to note is that, by default, Visual Studio automatically selects the Internet(Client) capability. If your application does not need this option then make sure to uncheck that before deploying.

With that setup you can now create a package for the Windows Store. You go to Project->Store->Create an App Package… and this time choose to build a package for uploading to the Windows Store. This process will run through various tests and if you get any failures make sure to correct them. I hit a couple of failures that were due to not setting the build mode to Release. Switching to that mode solved the App Package test failures. At this point, once the tests have passed you are now ready to upload the package to the Windows Store.
Logging into the Windows App Development site takes you to your dashboard. From here you can choose to Submit an App. This brings up a checklist that will walk you through the process.

Most of the items on this checklist are self explanatory. First, choose a unique application name. For mine, I choose Hacker News App. I chose to initially charge $1.99 for my application and am only distributing it to the US market since it has no localization or globalization built in. It does ask for a variety of screen shots that it will use to promote your application in the store which were a bit of pain to get. I found out later that Visual Studio has a handy screenshot utility located under Project -> Store -> Capture Screen shots…
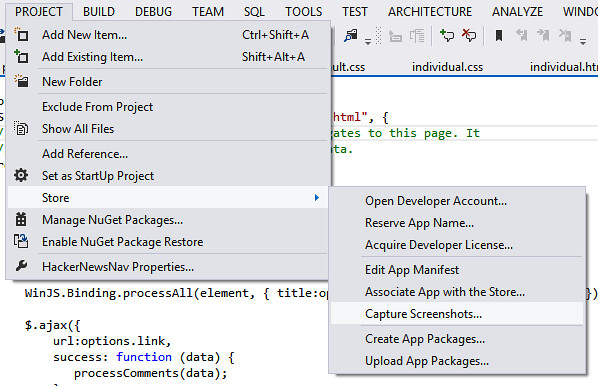
which launches a nifty simulator and allows you to capture screen shots of your application.
Finally you upload you application package - this will be the .appxupload file created in your application package folder which will automatically upload the correct application package. At this point you are set to submit the application to the store for certification. This process can take some time (several days depending on your application complexity) but you get a nice helpful checklist informing you of the different stages and which ones are in progress etc. For my application, I failed certification a couple of times and finally passed on the third time. The first time I failed because I had said my application was suitable for ages 3 and up but because it allowed users to access external sites this was not appropriate. Selecting 12 years and up got me past this hurdle.
The second hurdle I faced was that there was no privacy policy defined in the settings charm. Not only do you have to provide a link to a privacy policy on the description page before you upload the application, you have to ensure that when the application is installed, when a user brings up the application settings charm, there is a link to the privacy policy on there. I resolved this by adding the following page to my application
<!doctype HTML>
<html>
    <head>
        <title>Privacy policy</title>
    </head>
    <body>
        <!-- BEGINSETTINGFLYOUT -->
        <div data-win-control="WinJS.UI.SettingsFlyout" aria-label="help settings flyout" data-win-options="{settingsCommandId:'help',width:'narrow'}">
            <div class="win-ui-light win-header">
                <button type="button" onclick="WinJS.UI.SettingsFlyout.show()" class="win-backbutton"></button>
                <div class="win-label">Privacy policy</div>
            </div>

            <div class="win-content">
                <div class="win-settings-section">
                    <p>This application does not collect or transmit any user's personal information, with the exception of technical information included in HTTP requests (such as your IP address). No personal information is used, stored, secured or disclosed by services this application works with.</p>
                    <a href="https://www.johndehavilland.com/privacypolicy.htm">View privacy statement online</a>
                </div>
            </div>

        </div>
        <!-- ENDSETTINGSFLYOUT -->
    </body>
</html>
and I added the following to the default.js activated listener
// Add privacy policy to settings charm
WinJS.Application.onsettings = function (e) {
    e.detail.applicationcommands = { "help": { title: "Privacy Policy", href: "/privacypolicy.htm" } };
    WinJS.UI.SettingsFlyout.populateSettings(e);
};
This results in a nice privacy page flyout that satisfies the Windows Store Requirement.

The other piece that I got rejected for was that the application navigated the user to the external website when they touched the story link. This would launch IE immediately and browse to the website. The Windows Store requirements state:
2.4 The primary experiences your app provides must take place within the app
To overcome this issue, I reworked the application so that the main experience took place in the application and that visiting the original link was not as prominent a feature as originally planned.
Once the application was certified it was published to the application store. After a day or so I could search and find the application and could download it and install it. Overall I found the experience very easy and intuitive.
My application can be accessed here: http://apps.microsoft.com/windows/en-us/app/hacker-news-app/d26f7f82-0c9d-46fa-aecf-f02f817a0729