I have been starting to make more and more forays into JavaScript and decided to bite the bullet and look into one of the more popular javascript libraries that allow a full application to be built, end to end with JavaScript. First was deciding what I was going focus on. Initially I started to look at backbone.js but discovered that really, backbone.js was more for handling your view layer better. You still needed some form of server side components. Looking for something more, I turned to node.js. Their website proclaims:
Node.js is a platform built on Chrome’s JavaScript runtime for easily building fast, scalable network applications. Node.js uses an event-driven, non-blocking I/O model that makes it lightweight and efficient, perfect for data-intensive real-time applications that run across distributed devices.
Perfect.
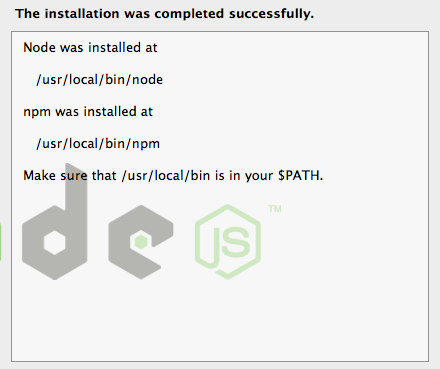
First step was to install node.js.
The final steps of the install screen shows the configured paths
Next was to create the obligatory Hello World. Right on the homepage of the node.js site they provide a short example of this.
First, create a helloworld.js file containing this code
var http = require('http');
http.createServer(function (req, res) {
  res.writeHead(200, {'Content-Type': 'text/plain'});
  res.end('Hello World\n');
}).listen(1337, '127.0.0.1');
console.log('Server running at http://127.0.0.1:1337/');
Go to the terminal and, in the directory you saved this file to, type node helloworld.js

and browse to http://127.0.0.1:1337/ and you see

I found that the short videos on nodetuts.com were a very good brief introduction to node.js, the node package manager and some aspects of how to get up and running with node. The Node for beginners book is also a great resource. Some interesting points off the bat are that node allows you to run javascript both in and out of the browser. This is quite neat. Also, unlike more traditional web applications, node.js contains not only the web application but the web server as well.
So, onto more meaty problems. I wanted to delve more into Node.js and build a fully functional application. I had recently created my blog engine (the one that powers this site) in asp.net MVC. As a challenge, I wanted to see how easy it would be to recreate this same blog engine in Node.js. One that allows me to write posts in MarkDown and then have them rendered in HTML in the blog itself. This would allow me to get some practice with Node.js without having to enter unknown ground. If successful, it would also me I could move my blog engine off the proprietary .net stack and open myself up to hosting on cheaper alternatives.
So to build my blog engine in node I created a basic structure as follows:

For the persistence layer I planned to use MongoDB - a NoSql database which supports a document-oriented structure. It was relatively easy to get MongoDB installed locally and get it up and running. In order to use MongoDB with my Node.js blog application I decided to use the mongojs node package. Installing packages to your node.js site is very easy. From the directory of your application, in the command line, run npm <name of package>. This will add the package to your application’s node_modules folder. With mongojs added I now had a nice api to interact with mongodb from my node.js.
For my blog engine I wanted it to be fairly RESTful. To that end I needed to expose some RESTful routes so, in my app.js, I defined the following:
app.get('/', posts.findAll);
app.get('/page/:id', posts.findAll);
app.get('/users/login', user.login);
app.get('/posts', posts.findAll);
app.get('/posts/add', isUser, posts.addPostForm);
app.get('/posts/rss', posts.rssFeed)
app.get('/posts/:id', posts.viewPost);
app.get('/posts/edit/:id', isUser, posts.updatePostForm);
app.post('/posts', isUser, posts.addPost);
app.put('/posts/edit/:id', isUser, posts.updatePost);
app.post('/users/login', user.loginPost);
app.get('/users/logout', isUser, user.logout);
app.delete('/posts/:id', isUser, posts.deletePost);
app.get('/user/about', user.aboutUser);
You will notice the ones with isUser are calling a custom isUser function that returns true or false if a user is logged in or not. For each of my routes I defined 2 controllers: posts.js and user.js. Posts.js handled the functionality of retrieving, adding, updating posts etc., and user.js handled the functionality for user login etc.
For my posts I wanted to be able to allow an authorized user to be able to create their post in Markdown and then have the application automatically convert it to HTML. I wanted the post editing page to show, side by side, the Markdown and the generated HTML. In the asp.net version of my site this worked just fine. In order to replicate that in the node.js version I utilized a couple of packages to help with the conversion: showdown. This makes the conversion of Markdown to HTML effortless.
In my posts.js controller I get a reference to the showdown package:
var convertor = new showdown.converter();and then when creating (or updating) a post I simply call
convertor.makeHtml(body)where body is the text input that is in markdown syntax. I decided to do the conversion at the save post time as well as storing the original markdown text versus having to convert to html on the fly each time.

In order to render my blog site I was using the node templating engine, jade. It makes the rendering very straightforward, however some of its little nuances take a bit to get used to. I created a layout view and then extended that for a variety of different views. For the homepage I wanted to implement some form of paging so that only a subset of posts were loaded on a visit. This is very straightforward to achieve, especially with the mongojs api.
First, I created a route for managing pages
app.get('/page/:id', posts.findAll); This would call the posts.js findAll function with a specific page id which would simply be the page the user was on. In the findAll function I check for the existence of this id and set its value to a variable - pageId. I would use this and my hardcoded limit of 10 posts per page to determine the starting post number (e.g. if pageId = 4 then the starting post would be the 31st). Based on this, I could call the mongojs as follows
db.posts.find().sort({created:-1}).skip(postCountStart).limit(postsPerPage)which would return just the right set of posts based on my paging criteria.
I also wanted to create an RSS feed for my blog. This, again, was very easy through the use of a node package, feed. I exposed a rssFeed function in my posts.js controller and mapped this to the /posts/rss path. In this function I created the feed and added each post to the feed. To send the feed to the client I simply called
res.send(feed.render('rss-2.0'));Overall, my experience so far with Node.js has been great. I hope I get time to explore it more as I have a huge amount to learn. I will be uploading my code for this blog engine to github very soon.